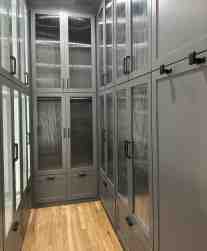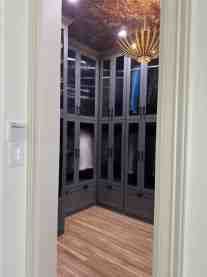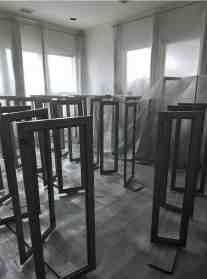
Renovating a bathroom and closet can be an exciting endeavor, but it requires some preparation to ensure that the process goes smoothly and your home and belongings are protected. Unlike a kitchen renovation, when you remove a functioning bathroom and closet, your personal space is relocated and typically shared with other members of the family. It can be a trying experience for everyone.


Now that you’ve decided to renovate your bathroom and closet, and the Contractor gives you the first day of demolition, how do you start to prep? Planning ahead is key. Where are you going to store your clothing? What about your shoes? What other bathroom space are you going to use for the duration of your project, and where do you stow all of those toiletries?
Answering these questions prior to demo will help ease into the renovation process and give you a little peace of mind.
Here's how to prep your home and clothes for a bath and closet renovation, and some tips for your sanity to remain intact along the way; it is possible!
Now that you’re venturing into a project to give you the closet of your dreams, where do you put your stuff?
1. Designate a space in your home that is not used that often. If it’s a place that is not occupied or used daily; this could be a guest bedroom, office or even part of your garage.
2. Measure how many feet of hanging space you have in your existing closet. This number will probably end up being more than you need since it’s common to purge when those clothes are being relocated.
3. Set up a donation box/pile for those pieces you no longer need.
4. Launder or dry clean any soiled clothes so stains don’t set while in storage.
5. Purchase (or DIY your own) clothing racks from a storage specialty store, big box home improvement, or bath store. Take into account the measurements you took when purging, so you have enough hanging space. NOTE: If you are hanging items in your garage, you might want to get plastic covers for your clothes to keep them clean and protected from dirt and pests.
6. Organize by category for easy access. All dress shirts together, golf shirts, dresses, etc.
7. Out of season items can be stored in boxes since they won’t need to be accessible.
8. Store shoes in clear bags to keep protected.
9. Belts, and accessories are best stored in hanging specialty containers, and kept with the clothing.
10. Any items that were in drawers can be stored in moving boxes and labeled. Stack like cubbies for a quick way to locate items.


Once you determine which secondary bath you’ll use during renovation, here are some of our favorite ways to keep organized, especially if you’re sharing a space with another family member during this adventure:
1. If you have college aged kids, or a good memory of your own experience, a shower caddy is a great way to store frequently used items during a bath renovation.
2. Plastic bins to protect areas from spillage are perfect for those infrequently used items.
3. Make-up and hair appliances can be handily stored in a shower caddy, specifically designated for each group of products.
There is no getting around it, renovation is messy. If you plan on keeping items in or nearby the construction area, make sure you (or your GC) properly protects the items.
1. Tarps and a good roll of tape keeps debris off of what you’re protecting.
2. Hanging plastic with a zipper for access is a great way to cordon off the construction area.
3. Placing a HVAC filter over the return keeps dust from circulating through the house.
4. Finally, keep any valuables (cash, jewelry, guns, designer clothing and handbags) in a secure and locked location away from the worksite.

1. Ensure that they job site is secure when work is done for the day
2. Install temporary barriers to keep kids and pets out of the work zone.
3. Communicate with your contractor any specific instructions for your home. For instance, the workday is done and workers need to leave for the date at a certain time, weekend hours, smoke-free zone, cleaning up at the end of each day, etc.

Taking that extra step before construction begins is key to a more stress-free renovation. The better prepared you are, the sooner the trades can get their work done and on time/budget. Setting and managing expectations of the work crew and your family will ensure everyone is on the same page and emotions can be kept in check.
Living in a construction zone is never easy, but with the right preparation, your family will look back on this process as not as bad as they thought! And remember, you’ll have a beautiful new bathroom and/or closet to enjoy for much longer than it took to renovate!
What other tips can you think of for a stress-free bath and closet renovation?

A smart kitchen renovation is one of the most impactful upgrades in home interior design. Combining…
View Post
Interior design rules have long provided structure—but in 2026, many of them are quietly being set…
View Post
Design Trends vs. Timeless Style: What We Recommend, and Why Every year brings a new wave of…
View Post
The holidays are the perfect time to make your home feel cozy, festive, and full of personality.…
View Post